Engraved Stamp Production Process as described by A.J. Sefi
Nov 23, 2022 9:38:33 GMT
Philatarium, Ryan, and 12 more like this
Post by michael on Nov 23, 2022 9:38:33 GMT
My introduction to engraved stamps started only 11 years when I bought an early St. Helena stamp which had a flaw. In looking into how this occurred, I learnt for the first time how engraved stamps were printed and how printing plates were produced. I became fascinated by the process and this eventually resulted in my being a collector of the stamps produced by Perkins Bacon & Co. Ltd.
The way early stamps were produced is well explained in the book, "An Introduction to Advanced Philately", by Alexander J. Sefi, first published in 1926 (250 copies) and printed on hand-made paper. They normally sell in the $100 to $200 range but the RPSL have digitised the book and you can buy it from their website.

Rather than just explain the process in words and pictures he commissioned Perkins Bacon to produce a die, a roller and a plate as per their normal stamp production. Stamps were printed during each step of the process and samples are included in the book along with photos of the components. There is also a section with samples of the various paper types.
Similar sections are included for surface and lithography printing and a second edition in 1932 (400 copies) includes a section on photogravure.
So in as few words as possible, here is the process.
In recess printing the image is incised into the surface of the plate and this holds the ink. When the paper is laid on the plate and pressure applied, the ink is transferred to the paper. It is the opposite of relief or surface printing where the image is raised above the surface of the plate.
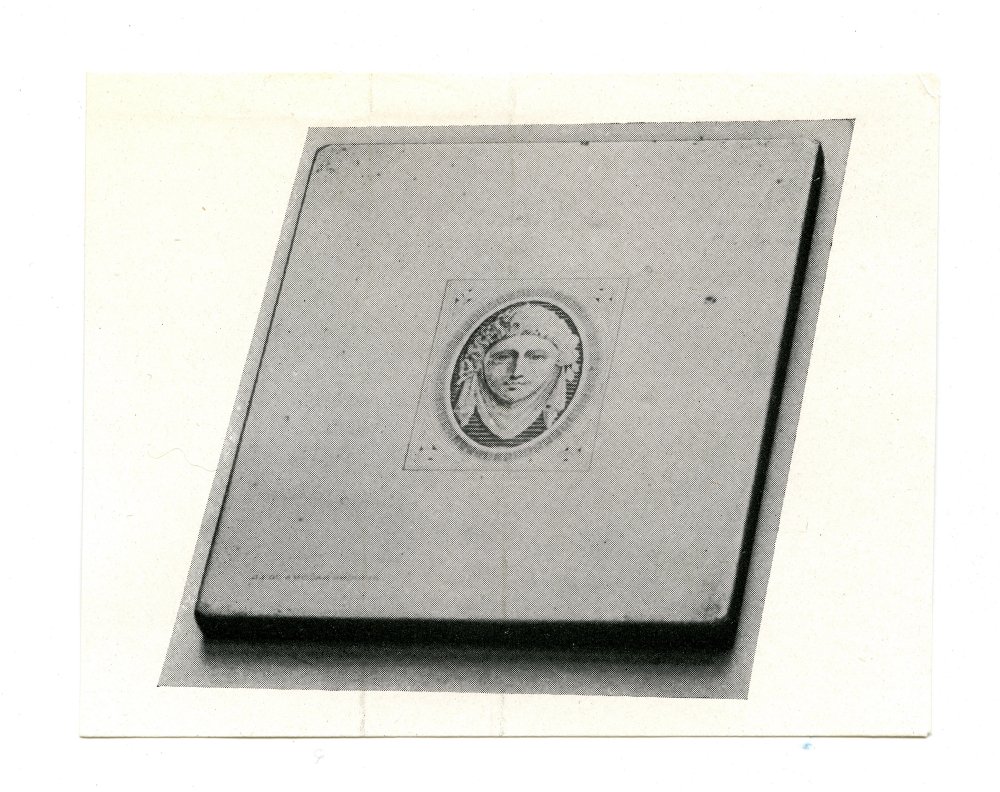
The process start with the cutting of the design using machines and hand engraving into a die of softened steel.


The die is then hardened. A softened steel transfer roller is then rolled over the die in a transfer press and the design is now in relief on this roller.

The transfer roller is then hardened and is used many times to transfer the image to a softened plate. The softened plate, containing multiple impressions of the original die is then hardened and is then ready for producing the sheets of stamps.
During the laying down of the plate the first impression was intentionally laid down offset to create a re-entry or double transfer.


The re-entry on stamp 1.

Stamp 6 was then intentionally damaged.
A print from the plate showing the damaged stamp.


The way early stamps were produced is well explained in the book, "An Introduction to Advanced Philately", by Alexander J. Sefi, first published in 1926 (250 copies) and printed on hand-made paper. They normally sell in the $100 to $200 range but the RPSL have digitised the book and you can buy it from their website.

Rather than just explain the process in words and pictures he commissioned Perkins Bacon to produce a die, a roller and a plate as per their normal stamp production. Stamps were printed during each step of the process and samples are included in the book along with photos of the components. There is also a section with samples of the various paper types.
Similar sections are included for surface and lithography printing and a second edition in 1932 (400 copies) includes a section on photogravure.
So in as few words as possible, here is the process.
In recess printing the image is incised into the surface of the plate and this holds the ink. When the paper is laid on the plate and pressure applied, the ink is transferred to the paper. It is the opposite of relief or surface printing where the image is raised above the surface of the plate.
The process start with the cutting of the design using machines and hand engraving into a die of softened steel.
Photograph of the finished die.

Sample print from the die.

The die is then hardened. A softened steel transfer roller is then rolled over the die in a transfer press and the design is now in relief on this roller.
Photograph of the roller.

The transfer roller is then hardened and is used many times to transfer the image to a softened plate. The softened plate, containing multiple impressions of the original die is then hardened and is then ready for producing the sheets of stamps.
During the laying down of the plate the first impression was intentionally laid down offset to create a re-entry or double transfer.
Photograph of the plate.

A print from the plate showing a re-entry on stamp 1.

The re-entry on stamp 1.

Stamp 6 was then intentionally damaged.
A print from the plate showing the damaged stamp.

The damage to stamp 6 was corrected by an engraver to show how damaged plates can be repaired.
A print from the plate showing the restored stamp.

Part of stamp 6 showing how the damaged plate was expertly repaired.


